Just add some paint - picture frame
About a month ago I was at Ross trying to find some good buys and I came across this picture frame with a great price tag - so I snatched it up.
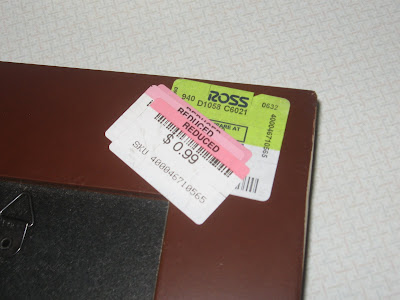
Since then, it's been sitting in my garage . . . until today. There wasn't anything really wrong with it, but it did have a small chip on the front. I sanded it down to make it smooth and then decided to give it a little face lift (you can see the sanded part on the left side of the frame). Here's what I started with:
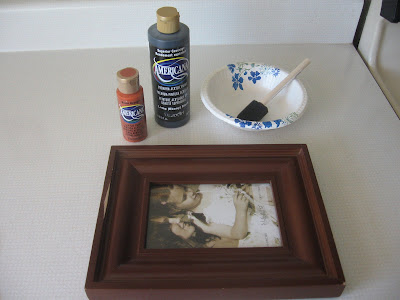
The orange color is called Burnt Orange. I first painted the frame black with my craft paint.
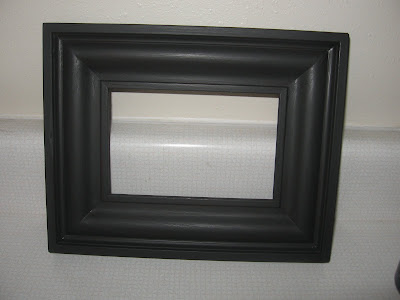
After it had dried, I then added a bit of the Burnt Orange color and wiped it off with a paper towel and ended up with this.

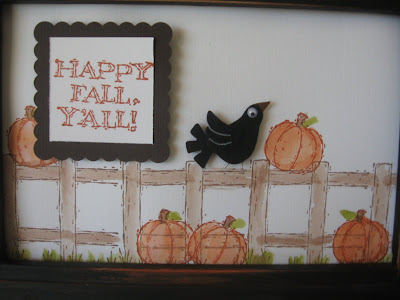
I thought about putting in a cute fall or Halloween photo but didn't have any on hand so I decided to create my own "picture" with one of my Stampin' Up stamp sets.
I stamped the fence and pumpkins on some white card stock, did a little water coloring and added a cute little crow I found a Michael's.
Now it's complete. I love how the frame turned out with the orange highlights.
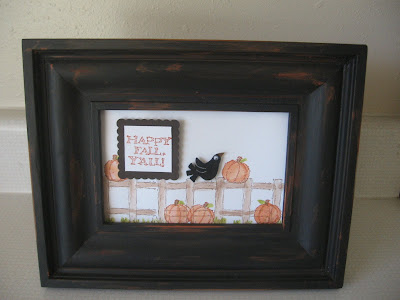
Here's a close up of my art work.
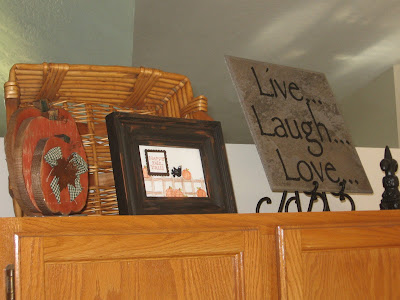
I decided to put it up on my kitchen cupboards for now.
On Thursday, Melissa over at 320 Sycamore is having a Under $10 and Under an Hour party. I think I'll be linking up this project.
I'm also linking up to:


Since then, it's been sitting in my garage . . . until today. There wasn't anything really wrong with it, but it did have a small chip on the front. I sanded it down to make it smooth and then decided to give it a little face lift (you can see the sanded part on the left side of the frame). Here's what I started with:

The orange color is called Burnt Orange. I first painted the frame black with my craft paint.

After it had dried, I then added a bit of the Burnt Orange color and wiped it off with a paper towel and ended up with this.

I thought about putting in a cute fall or Halloween photo but didn't have any on hand so I decided to create my own "picture" with one of my Stampin' Up stamp sets.
I stamped the fence and pumpkins on some white card stock, did a little water coloring and added a cute little crow I found a Michael's.
Now it's complete. I love how the frame turned out with the orange highlights.

Here's a close up of my art work.

I decided to put it up on my kitchen cupboards for now.

On Thursday, Melissa over at 320 Sycamore is having a Under $10 and Under an Hour party. I think I'll be linking up this project.
I'm also linking up to:

you are so creative! I love the way this turned out!
ReplyDeleteWhat a transformation I love it :)
ReplyDeleteI think I need to try one of those stampin up sets! What a cute picture!
ReplyDeleteI love that burnt orange on the black and I have a thing for chunkalicious frames too...especially for .99! Awesome.
ReplyDelete