Picture Frame Transformation
Okay, I finally finished my picture frames and they turned out just as I imagined. So you remember my pictures on my mantle that I said I was going to give a little makeover.

They originally were gold frames until I spray painted them black last year and hung them above our couch. But as you can see, they don't fill the space well enough and get lost on that big wall.

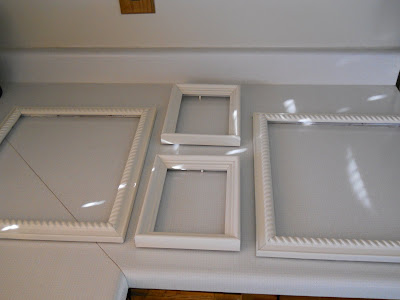
I had these other two 5x7 frames that I was going to use with this project too. They were a cherry wood color with a little gold boarder.

So anyway, I first took off the backing and the million staples in the back of each frame.

Then I sprayed them with a couple coats of Heirloom White.

I bought a roll of brown paper with cream flowers at Dollar Tree that I used for the backing and cut a piece to size and put it under the glass.


Then I added my photo and put some glue dots on the back of the smaller frame.

Then I attached it to the bigger frame and came up with this.

I'm sure this probably isn't an original idea, but I thought it was pretty clever. I love how they turned out.


So just a little recap from this long post - BEFORE:

And AFTER:

Linking Up:


They originally were gold frames until I spray painted them black last year and hung them above our couch. But as you can see, they don't fill the space well enough and get lost on that big wall.

I had these other two 5x7 frames that I was going to use with this project too. They were a cherry wood color with a little gold boarder.

So anyway, I first took off the backing and the million staples in the back of each frame.

Then I sprayed them with a couple coats of Heirloom White.

I bought a roll of brown paper with cream flowers at Dollar Tree that I used for the backing and cut a piece to size and put it under the glass.


Then I added my photo and put some glue dots on the back of the smaller frame.

Then I attached it to the bigger frame and came up with this.

I'm sure this probably isn't an original idea, but I thought it was pretty clever. I love how they turned out.


So just a little recap from this long post - BEFORE:

And AFTER:

Linking Up:


Kathy, you did an awesome job transforming those frames! I love it. Thanks for sharing and for your inspiration.
ReplyDeleteHave a wonderful day,
Gail
Those are fantastic Kathy!!! Can't say I've ever seen it done before like that. :)
ReplyDeleteThose are really nice! Great job with the layering effect....I had never seen that before!
ReplyDeleteSo cute! I have a frame in mind I might have to do this to!
ReplyDeleteVery clever idea and a thrifty way to enlarge and add depth to a smaller picture. I think they look perfect on your mantel. Thanks so much for the turorial and for sharing. I found you on Transformation Thursday;-)
ReplyDeleteI love this! Im doing a photo wall in our living room as we speak and this is the perfect touch for our space! Thank you for the great idea!
ReplyDeleteOooh - I love the way it turned out! Your update gives the pictures such a classy look. Better than you could probably buy anywhere. Looks lovely on your mantel.
ReplyDeletehttp://shannonsews.blogspot.com
Love those frames! I'm going to have to try that one!
ReplyDeleteHa! I have the exact same wrapping paper from the dollar store too! maybe that means I NEED to do this project :-) thanks for commenting on my blog! I can see you love spray paint too!
ReplyDeleteKathy those look great! :o)
ReplyDeleteBeautiful job!!!
ReplyDeleteSmiles!
Jami
Kathy, I love the frame updates. The double frame is brillant and I love the idea of using wrapping for the background - brillant! Thanks so much for linking to the Sunday Showcase - I greatly appreciate it. I'll be featuring this today - stop by and grab a featured button if you like. Hope you have a wonderful week ~ Stephanie Lynn
ReplyDeleteGreat idea! They look so different!
ReplyDeleteFrankly my dear I think these are fabulous! I will remember this idea and use it someday. Thanks for sharing. Stop over my blog and see my giveaway.
ReplyDeleteI've put together a round up of some great frame ideas on Craft Gossip today and included your project. :) You can see it here
ReplyDeletehttp://homeandgarden.craftgossip.com/9-fabulous-frame-crafts/
If you would like to share the Craft Gossip love and show your visitors you've been featured, you can grab a button here!
http://homeandgarden.craftgossip.com/grab-a-craft-gossip-button/
Those are just adorable. Forgive my stupid question but, does the little frame with the photo also have glass on the front or is it just the photo? Thanks so much. Patsy
ReplyDeleteYes, the glass is on top of the picture, just like a regular framed picture.
ReplyDelete